
Setting up a solar panel system at home typically takes between two to six months from initial consultation to final activation, with the actual physical installation completed in one to three days. The extended timeline reflects permitting requirements, utility approvals, and equipment procurement rather than the straightforward rooftop work itself. Understanding this phased process helps you plan your transition to clean energy with realistic expectations and fewer surprises along the way.
The journey to powering your home with sunlight breaks into distinct phases: design and site assessment (one to two weeks), permitting and approvals (four to eight weeks), equipment ordering (two to six weeks), installation (one to three days), and final inspection with grid connection (two to four weeks). Each phase depends on factors within and beyond your control. Your location matters significantly. California homeowners often experience faster permitting due to established solar-friendly protocols, while residents in areas with newer solar adoption may face longer approval queues as local authorities navigate less familiar territory.
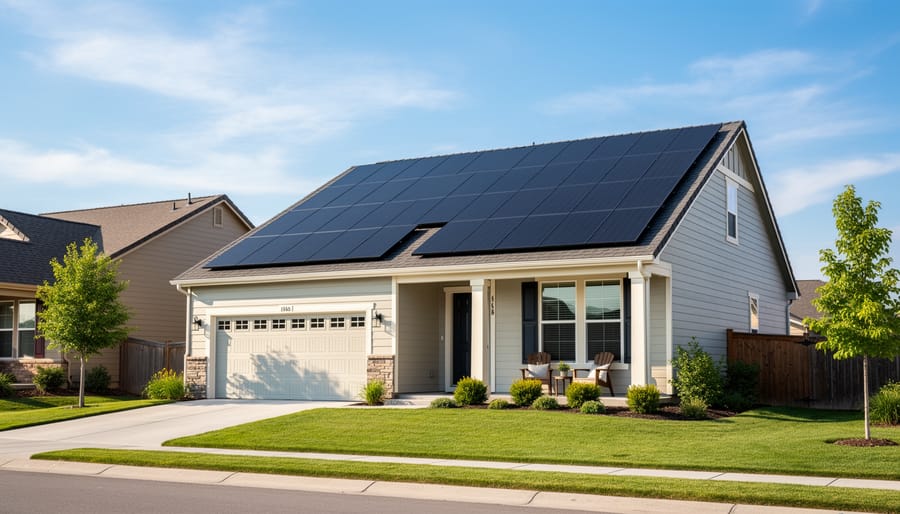
The physical installation represents just a fraction of your total timeline, but it’s where renewable technology transforms from paperwork into tangible infrastructure on your roof. Modern photovoltaic systems have become remarkably efficient to install, with experienced crews mounting panels, connecting inverters, and establishing your home’s connection to clean energy generation in remarkably short order.
Your preparation accelerates the entire process. Gathering property documentation, securing financing approval, and choosing a qualified installer before starting formal applications shaves weeks off average timelines. The investment in solar pays dividends for decades, making a few months of planning worthwhile for 25-plus years of reduced electricity costs and environmental impact.
Why Solar Panel Setup Duration Matters for Your Decision
Knowing how long your solar panel setup will take isn’t just about curiosity, it’s essential for smart planning. The timeline affects real money, your home’s schedule, and how quickly you’ll start making a positive environmental impact.
Financial timing matters more than most homeowners realize. Every month without solar means you’re still paying full electricity bills while watching rates climb. In 2026, utility costs continue their upward trend in most markets, and the federal solar tax credit still applies to your installation year. Delaying your project by several months could mean thousands in lost savings, especially if you’re planning around the end of a tax year or expecting rate increases.
Seasonal energy costs create another compelling reason to understand your timeline. If you live where summers bring scorching heat and air conditioning bills that triple, you’ll want your system operational before peak season hits. Starting your solar journey in winter might get you online by early summer, but starting in spring could mean sweating through another expensive season on grid power alone.
Home renovation coordination is equally crucial. Planning a roof replacement, exterior painting, or major electrical work? Your solar timeline needs to sync with these projects. Installing panels before addressing roof issues creates expensive complications, while scheduling everything together can save both time and money.
Perhaps most importantly, understanding the timeline helps you start reducing your carbon footprint sooner. Each month of delay means more fossil fuel consumption on your behalf. With climate concerns intensifying, many homeowners find that knowing they’re just weeks away from clean energy provides genuine peace of mind and motivation to move forward confidently.
The Complete Timeline: From First Contact to Flipping the Switch
The path from signing your first contract to powering your home with clean energy unfolds across six distinct phases, each with its own timeline and requirements. Understanding this framework helps you plan effectively and know what to expect at every turn.
| Phase | Typical Duration | Your Role |
|---|---|---|
| Research & Quotes | 1-2 weeks | Compare installers, ask questions |
| Site Assessment & Design | 1-2 weeks | Provide energy bills, answer questions |
| Permits & Paperwork | 2 weeks to 3+ months | Sign documents, respond to requests |
| Equipment Procurement | 1-4 weeks | Approve final system specs |
| Physical Installation | 1-3 days | Provide site access |
| Inspection & Grid Connection | 2-4 weeks | Be available for inspection appointment |
Most homeowners see their systems go live within two to four months of signing a contract, though variations occur based on location and complexity. The permitting phase creates the biggest variable, as local government processing speeds differ dramatically. Your installer handles the technical heavy lifting, but staying engaged and responsive throughout keeps the process moving smoothly toward that satisfying moment when your meter starts spinning backward.
Phase 1: Research, Quotes, and Choosing Your Installer
How to Speed Up Your Research Without Cutting Corners
Smart research doesn’t mean rushing the decision. Start by organizing your vetting process systematically. Create a simple spreadsheet to compare quotes side-by-side, tracking equipment specs, warranties, price per watt, and installer credentials. This prevents the overwhelm of juggling multiple proposals and lets you spot outliers quickly.
Use solar comparison platforms that have matured by 2026, tools like EnergySage and SolarReviews now integrate real-time installer availability, verified customer feedback, and equipment performance data. These platforms pre-screen installers for licensing and insurance, eliminating hours of manual verification. Filter by installers with NABCEP-certified staff, since this credential signals serious expertise.
Check recent reviews (within the past year) on Google and the Better Business Bureau, focusing on how companies handle problems rather than just praise. A perfect five-star rating with generic comments raises red flags.
During consultations, ask pointed questions that reveal depth: “What monitoring system comes standard?” “How do you handle shading on the northeast corner?” “What’s your average permit approval time in this jurisdiction?” Vague answers suggest inexperience.
Request references from installations completed in the past six months in your area. A five-minute call with a recent customer reveals more than any marketing material. Most homeowners who’ve gone solar are enthusiastic about sharing their experience, making this step easier than you’d expect.
Phase 2: Site Assessment and Custom System Design
Once you’ve chosen an installer, the technical evaluation begins, and this is where your solar dreams meet engineering reality. The site assessment and custom system design phase typically takes 1-2 weeks and transforms your energy bills and roof measurements into a precise solar blueprint.
Your installer’s team will schedule an on-site visit to evaluate every factor that affects your system’s performance. They’ll inspect your roof’s condition, age, and structural integrity to ensure it can support solar panels for the next 25+ years. If your roof needs repairs or replacement, addressing that now prevents costly panel removal and reinstallation later.
Modern installers leverage cutting-edge technology that wasn’t available even a few years ago. Many now use drone surveys to capture detailed aerial imagery and thermal data without climbing on your roof. This footage feeds into sophisticated 3D modeling software that creates a digital twin of your property, allowing engineers to test different panel configurations virtually before a single mounting bracket is installed.
The shading analysis is particularly crucial and has become remarkably precise. Using tools like solar pathfinders or specialized software, installers map how shadows from trees, chimneys, and neighboring structures move across your roof throughout the year. Even partial shading on a few panels can significantly impact your system’s output, so this step directly affects your return on investment.
Understanding these technical terms helps you follow the design conversation:
- Solar irradiance mapping
- Measurement of how much sunlight energy hits your specific roof location throughout the year, accounting for weather patterns and geographic position. This data determines your system’s realistic power generation potential.
- Azimuth angle
- The compass direction your panels face, typically south-facing in the northern hemisphere for maximum sun exposure. Installers calculate the optimal angle to capture the most daily and seasonal sunlight.
- Inverter sizing
- Matching the inverter’s capacity to your panel array’s output, balancing current energy needs with potential future expansion. Proper sizing ensures efficient conversion of DC power from panels to AC power for your home.
Your installer will also audit your electrical panel to verify it can handle the new solar input and review 12 months of utility bills to understand your energy consumption patterns. This comprehensive data gathering ensures the final system design matches your actual needs rather than generic assumptions. By the end of this phase, you’ll have a customized proposal showing exactly how many panels you need, where they’ll go, and what production to expect, turning abstract solar concepts into a concrete plan for your home.
Phase 3: Permits and Paperwork (The Biggest Variable)

Which States and Cities Have the Fastest Approval Times?
Permitting timelines vary dramatically across the United States, with some jurisdictions approving residential solar installations in as little as 5-7 business days while others take 8-12 weeks or longer. California, Arizona, and Colorado generally lead in processing speed, thanks to dedicated solar permitting portals and trained staff who understand photovoltaic systems. Many cities in these states have implemented “express permitting” programs specifically for standard residential solar projects that meet pre-approved design criteria.
What separates fast jurisdictions from slow ones? It comes down to three factors: dedicated online permit submission systems, staff familiarity with solar installations, and standardized checklists that eliminate back-and-forth corrections. Cities like San Diego, Phoenix, and Denver have invested in these improvements, recognizing that efficient permitting supports their renewable energy goals while reducing administrative burden.
Homeowners in slower jurisdictions shouldn’t despair. Even in areas where permits take 2-3 months, experienced installers know the local requirements and can navigate the process efficiently. They’ll submit complete applications the first time, reducing revision delays. Some slower regions have also adopted reforms by 2026, including same-day approvals for systems under certain wattage thresholds.
If you’re in a notoriously slow area, factor the extended timeline into your planning but don’t let it discourage you. The environmental benefits and long-term savings remain the same regardless of permit processing speed.
Phase 4: Equipment Procurement and Supply Chain Realities
Once your permits clear and you’re ready to move forward, your installer orders the physical components of your system. In 2026, most residential installations receive their equipment within one to four weeks, a significant improvement over the delays that plagued the solar industry in previous years.
The timeline depends largely on whether your installer is specifying in-stock equipment or ordering components to match a highly customized design. Standard panel models, string inverters, and racking systems that installers keep on hand or can source from regional distributors typically arrive within seven to ten days. If you’ve chosen cutting-edge bifacial panels, a specific microinverter brand, or specialty mounting hardware for a complex roof configuration, expect the two to four week range.
Domestic manufacturing expansion has stabilized supply chains considerably. The growth of U.S.-based production facilities for panels and inverters means shorter shipping distances and fewer international logistics bottlenecks. Components manufactured domestically often arrive faster and with more predictable lead times than imported alternatives.
Your installer’s relationships with suppliers matter here. Established companies with strong distributor partnerships can often expedite orders or tap into reserve inventory when needed. During peak installation season in late spring and summer, having those connections prevents you from joining a backorder queue.
If your installer mentions a component is backordered, ask about equivalent alternatives rather than waiting. The performance difference between similar tier-one panels is often negligible, and switching to an available model can shave weeks off your timeline without compromising your system’s quality or output.
Phase 5: The Actual Installation Day(s)
After weeks of planning and approvals, installation day marks the moment when your solar vision becomes physical reality. For most residential systems, the actual installation takes just 1-3 days, surprisingly quick considering you’re adding a power plant to your roof.
The crew typically arrives early morning, unloading panels, mounting hardware, inverters, and specialized tools. Your home transforms into a buzzing work site as technicians coordinate rooftop and ground-level tasks simultaneously.
- The team secures mounting rails to your roof rafters, ensuring structural integrity and proper angling for optimal sun exposure.
- Panels are carefully lifted onto the roof (often using hoisting equipment for safety) and clipped into the mounting system in precise configurations.
- Electricians run conduit and wiring from the panels down to your electrical panel, connecting strings of panels according to the system design.
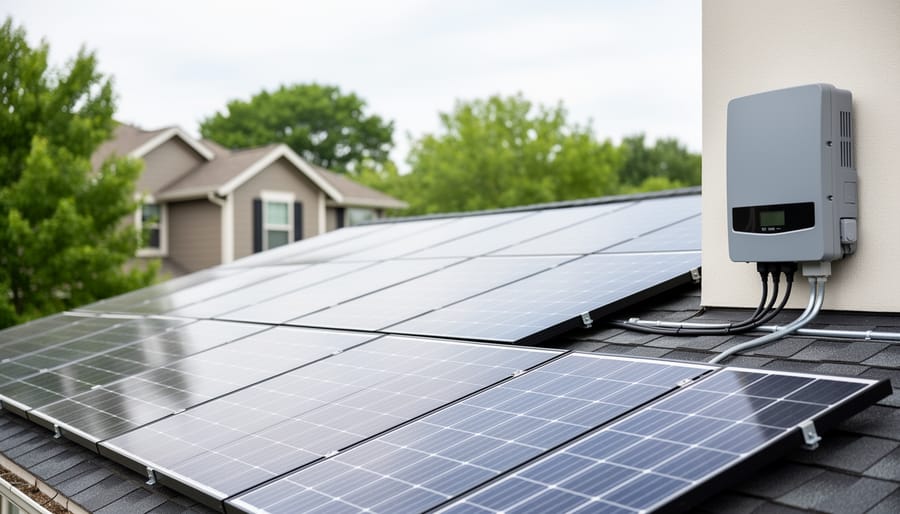
- The inverter gets mounted (usually in your garage or on an exterior wall) and connected to both the solar array and your home’s electrical system.
- The crew performs initial testing, checking connections, verifying voltage outputs, and ensuring everything communicates properly before they leave.
A standard 6-8 kW residential system on an accessible roof usually completes in one full day. More complex installations stretch to two or three days when you’re dealing with multiple roof planes, tile roofing that requires careful removal and replacement, necessary electrical panel upgrades, or larger system sizes.
The process is louder and more disruptive than many homeowners expect. You’ll hear drilling, the rhythm of panels being positioned, and crew members calling to each other. But there’s something genuinely exciting about watching your roof transform into an energy-generating asset panel by panel.
Most installers clean up thoroughly, hauling away packaging materials and conducting a final walkthrough. Your system won’t be operational yet, it still needs inspection and utility approval, but the physical transformation is complete, and you’re now unmistakably a solar home.
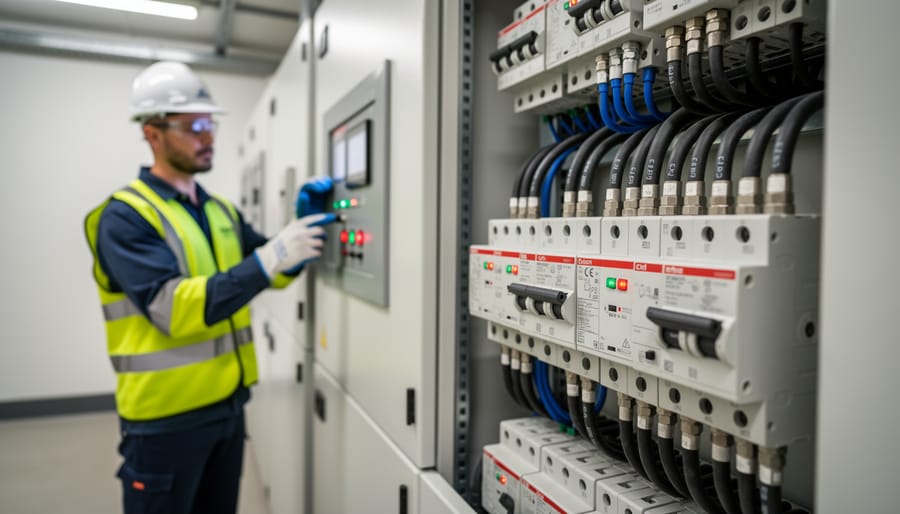
Phase 6: Inspection and Grid Connection
What Happens If Your System Fails Inspection?
First, take a breath. Inspection failures worry homeowners, but with licensed installers, they’re uncommon. Most professionals get it right the first time because they know exactly what inspectors check.
When issues do come up, they’re typically minor. An inspector might flag a missing electrical label, a conduit that needs repositioning, or grounding that requires adjustment. These aren’t signs of poor workmanship but rather small details that need tweaking to meet code specifications. Your installer will already know what needs fixing before you do.
Resolution happens fast. Most installers return within a day or two to address flagged items, completing corrections in a few hours. The inspector then either approves the work remotely or schedules a quick re-inspection, usually within the same week. You’re rarely looking at more than five to seven days from initial inspection to final approval.
The eco-benefit here is that inspections ensure your system operates safely and efficiently for decades, protecting both your investment and the environment. These checks verify that your solar panels will deliver reliable clean energy without electrical hazards, making the brief delay worthwhile for long-term performance.
Real-World Timeline Examples: Best Case vs. Average vs. Challenging
To understand what you’re really signing up for, let’s walk through three actual scenarios that show how dramatically solar panel setup duration can vary.
Best-Case Scenario: 6-8 Weeks Total
Meet Sarah in San Diego. She researched installers in January (off-peak season), chose a reputable company within 10 days, and had her site assessment completed the following week. Her city processes solar permits in 5-7 business days, her roof was in excellent condition requiring no upgrades, and her installer had panels in stock. The physical installation took two days in early February. The city inspector came within a week, and her utility approved interconnection in 10 days. Sarah was generating power 7 weeks after her first phone call.
What made this quick? Solar-friendly jurisdiction with streamlined permitting, no structural complications, off-season scheduling availability, and an experienced installer with equipment ready to go.
Average Scenario: 2-3 Months
Tom in suburban Chicago started his solar journey in April. Research and quotes took three weeks as he carefully vetted five companies. His site assessment revealed his electrical panel needed a minor upgrade, adding complexity. Local permits took four weeks to process. Equipment arrived in two weeks, but installation was scheduled three weeks out due to spring demand. The installation itself took three days. His inspection was scheduled two weeks later, and utility interconnection took another two weeks. Total timeline: 12 weeks.
Challenging Scenario: 4-6 Months
Jennifer in a historic district faced a longer road. Her HOA required architectural review (6 weeks alone), her roof needed repairs before installation could proceed (3 weeks), and her town’s building department was backlogged with summer construction projects (8 weeks for permits). Equipment delays added two weeks, and scheduling the actual installation took another three weeks. She finally went solar after 22 weeks.
| Phase | Best Case | Average Case | Challenging Case |
|---|---|---|---|
| Research to Contract | 1.5 weeks | 3 weeks | 3 weeks |
| Permits & Approvals | 1 week | 4 weeks | 14 weeks (HOA + permits) |
| Equipment & Scheduling | 2 weeks | 5 weeks | 8 weeks (roof repair + delays) |
| Installation to Power-On | 2.5 weeks | 4 weeks | 5 weeks |
The common thread? Permitting and approvals account for the widest variation. Your roof condition, local regulations, and seasonal timing matter more than the installation itself. Understanding where your situation falls helps you plan realistically and avoid frustration.
Factors That Can Speed Up or Slow Down Your Setup
Several key factors determine whether your solar installation wraps up in six weeks or stretches to six months. Understanding these variables helps you anticipate your actual timeline and plan accordingly.
Seasonal scheduling plays a surprisingly large role. Summer months see installer calendars fill quickly as demand peaks, potentially adding 2-3 weeks to your start date. Conversely, scheduling in fall or early spring often means faster availability, though winter weather in northern climates can pause installations during storms or extreme cold. Your panels work year-round once installed, so off-peak scheduling can actually accelerate your overall timeline.
Installer workload matters enormously. Established companies with strong reputations often carry 4-6 week backlogs, while newer installers might start within days. However, rushing with an inexperienced team frequently causes inspection failures and rework delays that negate any initial time savings. Check current lead times during your quote phase.
Your roof condition is a hidden wildcard. Installers assess structural integrity during site evaluation, and discovering needed repairs adds 1-2 weeks minimum while you coordinate separate roofing work. Address any known roof issues before starting the solar process, replacing shingles under new panels is inefficient and expensive.
Electrical panel capacity can derail timelines if your current setup can’t handle solar integration. Main panel upgrades require separate permits and licensed electrician coordination, potentially adding 2-4 weeks. Modern homes typically avoid this issue, but properties built before 2000 often need upgrades.
HOA involvement introduces unpredictability. Some associations approve solar applications within days using streamlined processes, while others schedule monthly architectural review meetings, adding 4-6 weeks regardless of your readiness. Submit HOA applications immediately after signing your contract, not after design completion.
Finally, local jurisdiction efficiency creates the widest variance. Solar-friendly municipalities with dedicated renewable energy staff process permits in 5-10 business days, while understaffed building departments in less solar-saturated areas might take 8-12 weeks for identical applications. Research your city’s typical solar permit timeline early, it’s usually the biggest factor you can’t control but must plan around.
How to Avoid Unnecessary Delays
The single most effective way to keep your solar installation on track? Choose an installer with a proven track record. Companies that have completed hundreds of local installations know the permitting quirks, inspector preferences, and utility requirements specific to your area. They’ve already built relationships with the right people. Check how long they’ve been operating in your region and ask for references from recent projects in your jurisdiction.
Once you’ve signed on, treat every document request like it’s urgent. When your installer needs signatures, utility account numbers, or HOA approval forms, respond within 24 hours. Permits sit in queues waiting for complete applications. A two-day delay in returning paperwork can push your entire timeline back by weeks because you’ve missed the current processing batch.
Build flexibility into your schedule for the installation days themselves. Weather delays happen, and crew availability shifts. Installers who know you can accommodate a rescheduled date will prioritize getting you back on the calendar quickly rather than bumping you to the end of a long queue.
Address roof issues before the site assessment. If your shingles are more than 15 years old or you’ve noticed any damage, get a roofing inspection first. Discovering you need repairs during the solar assessment adds weeks or months while you coordinate two separate projects. Installing panels on a roof that will need replacement in five years wastes the removal and reinstallation costs later.
Finally, designate one person as the primary contact and check in with your installer weekly. You’re not being pushy, you’re ensuring nothing falls through the cracks. A quick “any updates on the permit?” call can reveal issues that need your attention before they become bottlenecks.
So yes, your solar panel setup will likely take between two and four months from initial consultation to generating your first kilowatt-hour. That might feel longer than you’d hoped, but here’s the reality: those eight to sixteen weeks are a tiny fraction of the 25-plus years your system will produce clean energy.
Every day you delay starting means another day relying entirely on grid power and missing potential savings. The permitting paperwork doesn’t get easier by waiting, and installer schedules only fill up more as solar adoption accelerates. Beginning now means you’ll be producing your own electricity by fall or winter, offsetting energy costs during the seasons when you need it most.
The timeline challenges you’ve read about, permitting delays, inspection scheduling, utility interconnection, are temporary hurdles managed by your installer. What lasts is the environmental benefit. Your system will prevent tons of carbon emissions annually, contributing meaningfully to climate action while reducing your household’s fossil fuel dependence.
Thousands of homeowners made the switch in 2025, and adoption continues growing in 2026. Each new solar installation strengthens the renewable energy infrastructure and signals demand for cleaner power generation. You’re not just upgrading your home; you’re participating in an essential energy transition.
The wait is real, but the payoff, financial and environmental, compounds for decades. Start your research today, get those quotes scheduled, and join the expanding network of solar-powered homes reshaping how we generate electricity.


