
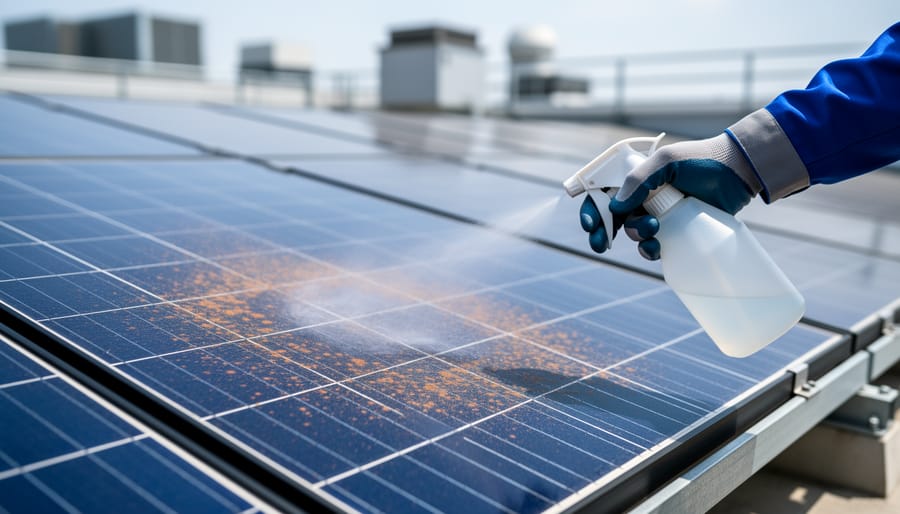
Solar panels covered in metallic orange or brown speckling aren’t just dirty. They’re contaminated with iron fallout, and removing it requires a chemical approach, not water and soap alone. This contamination comes from brake dust on nearby roads, rail operations, or industrial facilities, and it bonds to glass surfaces at a microscopic level. Left untreated, these particles reduce light transmission by up to 20%, directly cutting your energy output and ROI.
The solution is a dedicated iron fallout remover that dissolves these metallic contaminants through a chelation reaction. You’ll spray it on, watch it turn purple as it reacts with iron particles, then rinse clean. The entire process takes 30 to 45 minutes per array and requires no specialized equipment, making it accessible for most solar panel owners who want to protect their investment without hiring professionals.
Why this matters for renewable energy: every percentage point of efficiency you recover translates directly into more clean electricity and faster payback on your system. Solar panels are built to last 25 years or more, but that longevity depends on proper maintenance. Iron fallout is particularly insidious because it’s nearly invisible until buildup becomes severe, and standard cleaning methods simply push it around rather than removing it.
This guide walks you through identifying iron contamination on your panels, selecting the right products, applying them safely, and verifying complete removal. You’ll also learn prevention strategies to extend time between treatments. The process is straightforward, but precision matters. Using the wrong iron remover or skipping safety steps can damage panel coatings or void warranties, so following the correct procedure is essential for protecting both your equipment and your energy production.
What Is Iron Fallout and Where Does It Come From?
Why Solar Panel Owners Should Care
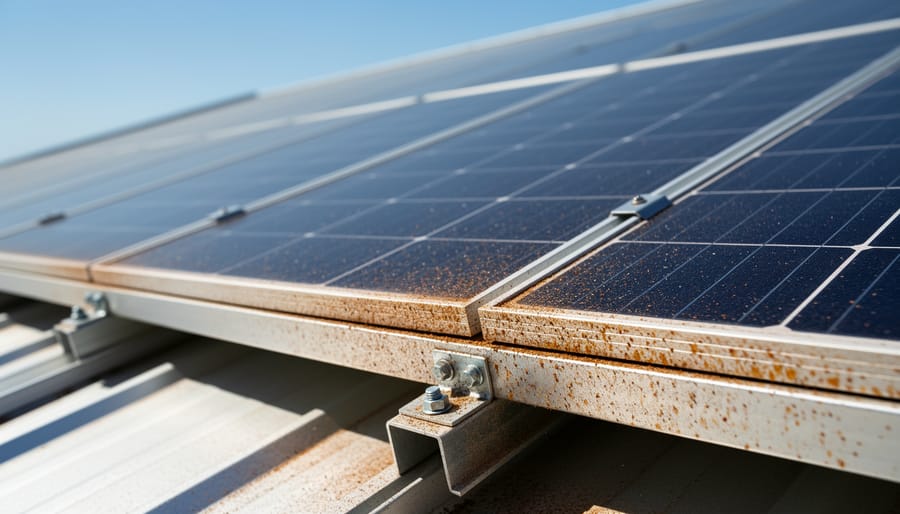
Iron fallout isn’t just an aesthetic problem, it directly attacks your solar investment in two ways. First, these metallic particles create a light-blocking film that reduces energy output. Even a thin layer of brake dust and rail contamination can cut solar panel performance by 15-25%, translating to hundreds of dollars in lost electricity generation annually for a typical residential system.
Second, iron fallout corrodes aluminum frames and mounting hardware through oxidation. When brake dust particles bond to your panel frames, they create rust spots that spread beneath the surface. Left untreated, this corrosion weakens structural integrity and can void warranties. In coastal or industrial areas, the combination of iron particles and moisture accelerates this degradation significantly.
From an environmental perspective, maintaining clean panels matters for maximizing renewable energy production. Every percentage point of efficiency you lose means your system offsets less fossil fuel generation. A 5kW system operating at 80% efficiency due to contamination fails to prevent roughly 1,500 pounds of CO₂ emissions annually compared to its clean potential.
Regular iron fallout removal protects both your financial investment and your contribution to clean energy. The few hours spent on proper maintenance ensure your panels deliver their full environmental benefit for their 25-30 year lifespan.
Tools and Materials You’ll Need
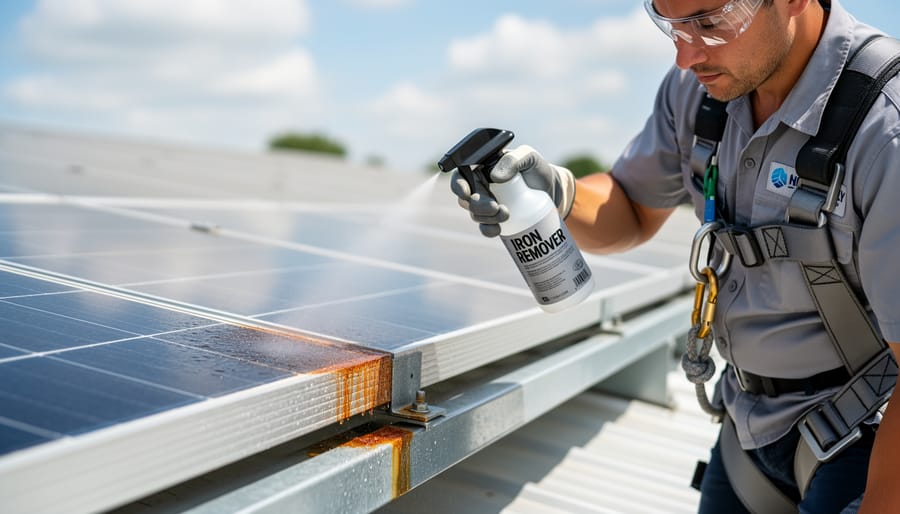
Gathering the right supplies before you start ensures a smooth, efficient cleaning process that protects your solar investment while effectively removing iron fallout contamination. You’ll need specialized materials that are safe for photovoltaic surfaces and won’t compromise your panels’ anti-reflective coatings or protective layers.
- Iron remover solution (pH-neutral, specifically labeled solar-safe or automotive clear-coat safe)
- At least three microfiber towels (one for application, one for drying, one as backup)
- Soft-bristle brush with non-abrasive synthetic bristles
- Garden sprayer or trigger spray bottle for solution application
- Chemical-resistant gloves rated for pH 6-8 solutions
- ANSI-approved safety glasses with side shields
- Garden hose with adjustable spray nozzle or pressure washer set below 1,500 PSI
- Bucket for mixing or diluting solutions
- Extension pole if working on ground-level or single-story installations
The iron remover is your most critical purchase. Look for products marketed for automotive detailing that explicitly state “clear-coat safe” or “paint-safe”, as these formulations won’t damage solar panel surfaces. Gyeon’s iron remover is the reference point to measure others against: a pH-balanced, clear-coat-safe formulation that changes colour as it reacts, so you can see the iron lifting. Specialist detailing suppliers such as Car Care Products carry it and the sprayers and microfibre to go with it. Expect to pay fifteen to thirty dollars for a bottle that handles multiple cleanings.
For eco-conscious buyers, look for a formula described as biodegradable, which breaks down naturally after rinsing. These products work equally well while minimizing environmental impact, aligning with the sustainability goals that likely motivated your solar installation in the first place.
Most supplies can be sourced locally from hardware stores, automotive sections, or home improvement centers. Buying microfiber towels in bulk packs of six to twelve offers better value for ongoing maintenance needs.
Safety Precautions Before You Begin
Before you climb onto your roof with cleaning supplies, understand that solar panel maintenance involves real hazards. Falls from heights remain one of the most common causes of serious home improvement injuries, and even a low-pitched residential roof presents risk when you’re distracted by the cleaning task.
Start by checking weather forecasts. You need dry conditions with minimal wind, ideally on a mild day when panels won’t be scorching hot to the touch. Early morning or late afternoon works best, giving you comfortable temperatures and reduced glare. Avoid working during storms or within 24 hours after rain when surfaces stay slippery.
Wear rubber-soled shoes with good tread, not sandals or smooth-bottomed footwear. Use a sturdy ladder with a standoff bracket to avoid leaning it directly against panels or frames. If your roof pitch exceeds 6:12 or you have a multi-story installation, hire a professional with proper fall protection equipment.
For chemical safety, always wear nitrile gloves and safety glasses when handling iron remover solutions. These products are generally pH-neutral and solar-safe, but they still irritate skin and eyes. Work in sections to avoid stepping on wet, treated surfaces that become slippery. Keep solutions away from junction boxes and wiring connections.
Inspect your panels visually from the ground first. If you spot cracked glass, exposed wiring, damaged frames, or loose mounting hardware, stop. These conditions require professional repair before any cleaning begins. Never spray water or chemicals near obviously damaged electrical components.
Step-by-Step Iron Fallout Removal Process
Step 1: Initial Rinse and Assessment
Start by turning off your solar system if possible, or schedule the cleaning during early morning or late evening when panels are cool and producing minimal energy. Use a standard garden hose with moderate pressure, never a pressure washer, which can damage seals and create microfractures. Begin at the top of the array and work downward, letting gravity help carry debris away.
As water flows across the surface, watch for brown or orange streaks that won’t rinse away immediately. These discolored spots indicate bonded iron particles. Pay special attention to the bottom edges of panels where contamination accumulates from runoff, the areas around mounting frames where particles settle, and any sections near roads or railways that collect more brake and rail dust.
Check panel corners and junction boxes carefully, these recessed areas trap the most fallout. Notice if water beads properly on clean sections but sheets across contaminated zones; this difference reveals where iron particles have etched into the surface. Contamination blocks light absorption and prevents panels from efficiently generate power so thorough assessment now saves time during treatment.
Step 2: Apply Iron Remover Solution
With your panels rinsed and the contamination assessed, it’s time to apply the iron remover solution. Start by shaking the bottle well, then spray the product directly onto the solar panel frames, mounting hardware, and junction box areas where iron fallout typically accumulates. You can also treat the outer edges of the glass surface, but avoid spraying the center of the panels unless you’ve confirmed significant contamination there.
Work in sections to prevent the solution from drying before you can complete the process. Apply a generous, even coating so the chemical can properly react with the metallic particles. Most quality iron removers are pH-neutral and safe for solar equipment, but always verify compatibility with your specific panel model.
Now comes the satisfying part: watch for the color change. Within 30 to 90 seconds, the solution will turn purple or red as it dissolves the iron particles through a chemical reaction. This visual indicator confirms the product is working. The deeper the color, the more contamination was present. Let the solution dwell for the time specified on your product label, typically three to five minutes, but never allow it to dry on the surface.
Step 3: Gentle Agitation and Brushing
Once the iron remover has dwelt on the surface and begun its chemical reaction, you’ll need to physically work the solution into stubborn deposits without damaging your panels. Use a soft-bristled detailing brush or foam applicator, never anything abrasive like steel wool or stiff scrub pads that could scratch the glass or aluminum frames.
Focus your brushing efforts on the solar panel frames, mounting rails, and junction boxes where iron fallout typically accumulates most heavily. These areas often develop thicker layers of contamination that need gentle mechanical action to fully break apart. Work in small circular motions with light pressure, letting the chemical do most of the work rather than scrubbing aggressively.
Pay special attention to corners, seams, and recessed areas where metallic particles hide. If you encounter resistance, reapply solution rather than increasing pressure. The goal is to dislodge loosened contaminants, not force them off through abrasion. Keep your brush damp with the iron remover throughout this process, and watch for the purple color intensifying as you work embedded particles free from the surface.
Step 4: Thorough Rinsing
After allowing the iron remover solution to work its magic, you must rinse every trace of it away to prevent residue buildup that reduces panel efficiency. Start at the top of the array and work downward, using a steady stream of clean water to flush all dissolved iron particles and chemical solution off the panels and frames.
Pay special attention to frame channels, mounting rails, and junction boxes where solution tends to pool. These areas need extra rinsing to avoid streaking or water spots. A gentle spray nozzle works better than high pressure, which can force water into sealed electrical components.
Continue rinsing until the water runs completely clear with no purple tint or foaming. This typically takes 2-3 minutes per panel section. To conserve water, collect runoff in buckets for garden irrigation, the diluted solution won’t harm plants. On larger installations, work in sections rather than wetting the entire array at once.
The goal is pristine, residue-free surfaces that maximize light transmission. Any remaining chemical film blocks sunlight just like the contamination you removed, so thoroughness matters more than speed during this critical step.
Step 5: Dry and Inspect
After the final rinse, proper drying prevents water spots that can reduce panel efficiency just as much as the iron fallout you just removed. Use clean, dry microfiber towels to gently wipe down the panels and frames. Work in overlapping sections from top to bottom, allowing gravity to help. Change towels as they become saturated, wet towels smear rather than absorb.
For the frames and mounting hardware, pay extra attention to crevices where water pools. These spots trap moisture that can restart oxidation if any iron particles remain.
Once dry, inspect your work under good lighting. Run your hand along the frame edges, they should feel smooth, not gritty. Check for any remaining purple or brown staining that indicates leftover contamination. Hold your inspection at an angle to catch spots you might miss from straight on.
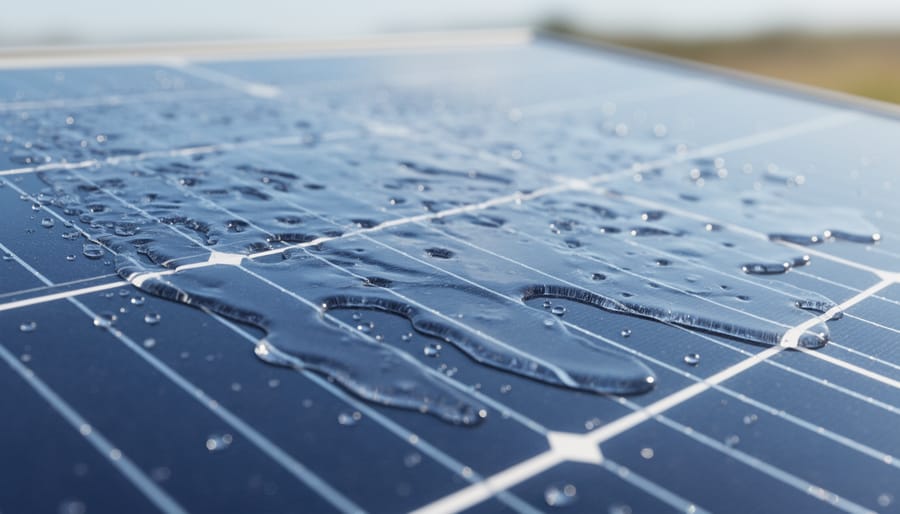
The water beading test confirms success: spray a small amount of clean water on the panel surface. It should sheet off cleanly rather than forming tight beads around contamination points. If beading occurs in specific areas, those sections need retreatment.
Finally, note the current date and energy output in your maintenance log. You should see improved generation within a few sunny days as your panels operate at full capacity again.
How to Verify Your Results and Measure Success
After completing the five-step removal process, you need to verify that all iron fallout is gone and your solar panels are performing at their best. Start with a close visual inspection in good daylight, clean panels should have a uniform appearance with no orange or brown spots, and frames should show their original metal finish without rust-colored staining. Run your gloved hand gently along the frame edges; properly cleaned surfaces feel smooth rather than gritty or rough.
The water beading test provides immediate confirmation of cleanliness. Spray clean water across the panel surface and watch how it behaves. On properly cleaned glass, water should sheet off smoothly or form tight, uniform beads that roll away easily. If water clings in irregular patterns or leaves streaky residue, contamination remains and you’ll need a second treatment focusing on those specific areas.
The most compelling verification comes from monitoring your system’s energy production. Check your inverter readings or monitoring app for the week following cleaning, comparing output to the previous week under similar weather conditions. Most residential systems show a 5-15% improvement in energy generation after removing significant iron fallout, though severely contaminated installations can see gains up to 25%. Track your daily kilowatt-hour production, if you’re not seeing noticeable improvement within three sunny days, inspect again for missed contamination or consider that other factors may be causing energy output loss. Document your results with photos and production data to establish your baseline for future maintenance scheduling.
Prevention and Maintenance Schedule
Preventing iron fallout buildup is simpler than dealing with heavy contamination. A proactive approach protects your solar investment and keeps energy production steady.
Location-Based Cleaning Schedule
Your environment dictates maintenance frequency. Urban properties near busy roads need quarterly cleanings, brake dust accumulates fast when you’re within 100 meters of high-traffic areas. Rural installations can stretch to semi-annual maintenance, though properties downwind from rail lines should match the urban schedule. Industrial zones require the most aggressive approach: inspect monthly and clean every eight weeks.
Monthly Quick Inspections
Spend five minutes each month checking your panels. Look for orange-brown speckling on frames and mounting hardware, that’s iron fallout starting to bond. Run a gloved finger along frame edges; gritty residue means it’s time for treatment. Check water beading after rain: poor beading signals contamination affecting panel surfaces.
Protective Measures
Strategic landscaping helps. Trees positioned to block prevailing winds from roads or rail lines reduce airborne particle exposure without shading panels. Apply a quality sealant to aluminum frames annually, it creates a barrier that makes future cleaning easier and protects against oxidation.
Keep a log of cleaning dates and energy output readings. Tracking this data reveals your property’s specific contamination pattern, letting you refine your schedule for optimal efficiency and minimal effort year-round.
Common Questions About Iron Fallout Removal
Will iron remover chemicals damage my solar panels?
pH-neutral iron removers formulated for automotive use are safe for solar panels when used as directed. Avoid acidic wheel cleaners and never apply chemicals directly to the panel glass, focus on frames, mounting hardware, and edges only.
How much does professional iron fallout removal cost?
Professional solar panel cleaning with iron fallout treatment typically runs $150-$400 for residential systems, depending on array size and contamination severity. DIY removal costs $30-$60 for supplies that handle multiple cleanings, making it cost-effective to protect your investment yourself.
What’s the best time of year to remove iron fallout?
Spring and fall offer ideal conditions, mild temperatures prevent rapid chemical drying, and you’re addressing accumulation from winter road salt and summer industrial activity. Avoid cleaning in direct sunlight or when panels are hot, as this reduces chemical effectiveness and can cause streaking.
Can I use the same process on different solar panel types?
Yes, this iron fallout removal method works safely across monocrystalline, polycrystalline, and thin-film panels. The key is treating only the aluminum or steel frames and hardware, not the glass surface itself, regardless of panel technology.
How do I know if I need professional help instead of DIY?
Call a professional if your array is difficult to access safely, contamination covers more than 40 percent of frame surfaces, you notice corrosion pitting in metal components, or you’re uncomfortable working at heights. Some warranties also require certified technicians for maintenance.
One concern many solar owners have is whether iron fallout removal will void their equipment warranty. Most manufacturers allow routine cleaning and maintenance by homeowners as long as you avoid harsh chemicals, abrasive tools, and direct panel disassembly. Check your specific warranty documentation before starting, and keep records of your cleaning products and dates for future reference.
The frequency question also matters. If you live within two miles of a highway, railway, or industrial area, quarterly inspections with biannual deep cleaning provide the best balance between effort and performance protection. Rural installations with minimal traffic can often extend to annual treatment, though you should always clean after noticing visible contamination or efficiency drops.
Regular iron fallout removal isn’t just about keeping your solar panels looking clean, it’s about protecting your investment in renewable energy and ensuring you get every watt of power you paid for. Those brake dust particles, rail residue, and industrial contaminants might seem minor, but left unchecked, they steadily chip away at your system’s efficiency and can permanently damage expensive frames and components.
The five-step process we’ve covered takes less than an hour for most residential installations. You rinse, apply the solution, gently agitate, rinse again, and dry. It’s straightforward, requires no specialized skills, and delivers immediate results you can see in your energy production data.
Beyond the financial benefits of maintained efficiency, there’s a broader environmental win here. Solar panels represent your commitment to clean energy. When contamination reduces their output, fossil fuel sources pick up the slack elsewhere on the grid. Keeping your panels operating at peak capacity means maximizing your contribution to reducing carbon emissions, the very reason most people choose solar in the first place.
Set a reminder to inspect your panels every month and perform a thorough iron fallout treatment two to four times yearly, depending on your location. Your system will reward you with consistent, optimal performance and a longer operational lifespan. Schedule your first cleaning this weekend and start getting the full return on your renewable energy investment.


