
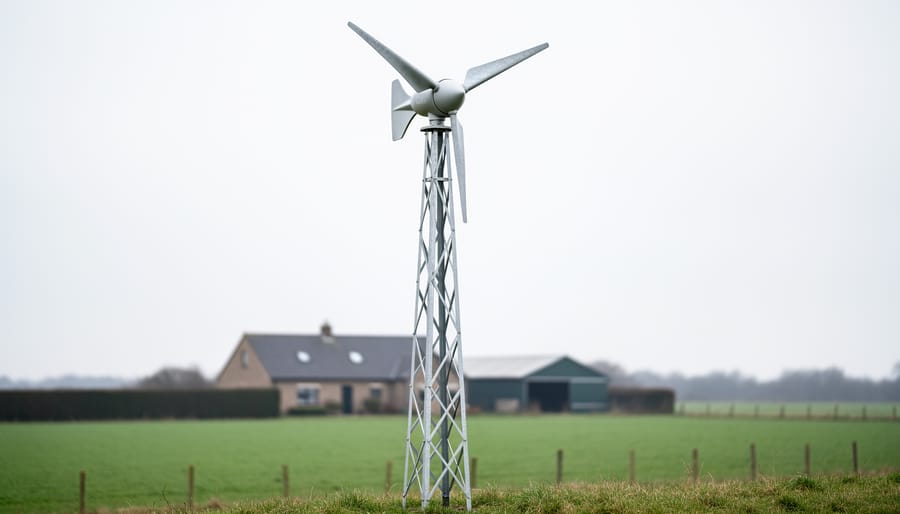
Installing a small home wind turbine takes most DIYers two to four days, depending on tower height and electrical complexity. The process involves assembling the turbine, erecting a secure mounting structure (typically 30 to 80 feet tall), wiring the system to your home’s electrical panel, and commissioning the unit to ensure safe, reliable operation. Unlike how long solar takes wind installations demand careful attention to wind exposure, height regulations, and mechanical assembly under potentially challenging conditions.
Small wind turbines deliver genuine energy independence when sited correctly. A well-placed 1kW to 10kW system can offset 20% to 100% of a household’s electricity consumption, slashing utility bills while reducing your carbon footprint. The 2026 generation of micro-turbines incorporates brushless permanent magnet alternators, smart inverters with grid-tie capability, and quieter blade designs that minimize noise complaints. These advances make residential wind more practical than ever for suburban and rural properties with adequate wind resources.
Success hinges on preparation. You’ll need specialized tools, safety equipment rated for working at heights, and a clear understanding of electrical codes. This guide walks you through every phase: assembling components on the ground, safely raising the tower, connecting to your electrical system, and verifying performance. Each step includes the critical checkpoints that prevent costly mistakes and ensure your turbine operates efficiently for its 20-plus-year lifespan. Whether you’re supplementing solar panels or building a standalone wind system, the following instructions provide the complete roadmap from delivery to first kilowatt-hour.
Tools, Materials, and Equipment You’ll Need
Gathering the right equipment before you begin prevents costly mid-project delays and ensures a smooth installation from foundation to final connection. Small wind turbine installations require three categories of items: basic construction tools, structural materials, and the turbine system’s electrical components.
- Adjustable wrenches and socket set (metric and standard) for assembling tower sections and mounting hardware
- Torque wrench calibrated to manufacturer specifications (typically 50-150 ft-lbs range) for critical fasteners
- 4-foot level and plumb bob to verify tower alignment during erection
- Power drill with masonry bits for concrete anchor installation
- Wire strippers, crimpers, and multimeter for electrical connections and testing
- Ready-mix concrete (typically 1-2 cubic yards depending on turbine size and tower height)
- Galvanized anchor bolts matching your tower’s base plate specifications
- Electrical conduit (PVC or metal) rated for outdoor burial, sized to turbine cable requirements
- Mounting hardware kit including all bolts, washers, and lock nuts (often included with turbine)
- Guy wire cables and tensioners if installing a guyed tower configuration
Beyond construction supplies, you’ll need the complete turbine system. This includes the nacelle housing the generator, rotor blades (usually three for residential models), and tower sections. The electrical side requires a charge controller, a device that regulates power flow to prevent battery overcharging in off-grid setups, and an inverter to convert the turbine’s DC output into household AC power. Grid-tied systems use a specialized grid-tie inverter that synchronizes with utility power and often includes anti-islanding protection for safety.
Don’t forget safety gear: a hard hat, work gloves, safety glasses, and a harness with lanyard if you’ll be working at height during tower assembly. Many manufacturers provide detailed parts lists with their installation manuals, so cross-reference this checklist against your specific turbine model before purchasing. Having everything on-site when you start saves trips to the hardware store and keeps your installation timeline on track.
Pre-Installation Safety and Site Assessment
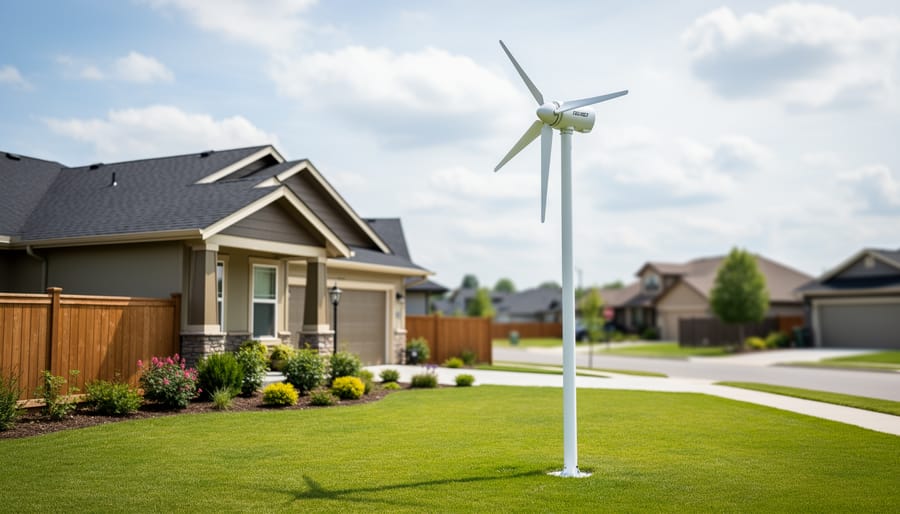
Wind Resource Evaluation
Your location needs a minimum 10 mph average wind speed to make a small turbine worthwhile. Start by checking the National Renewable Energy Laboratory’s wind resource maps at, which show average speeds by region and height. These maps provide a baseline, but local terrain, hills, buildings, tree lines, creates significant variation within a few hundred feet.
For accurate site-specific data, install an inexpensive anemometer on a pole at your planned turbine height for at least one month, ideally three. Record readings at different times to capture seasonal patterns. Position this temporary measuring pole in the same spot you’ll erect the turbine, matching the height as closely as possible.
Turbine placement is equally critical. Install at least 30 feet above any obstacle within 300 feet, trees, buildings, silos. Wind accelerates over obstructions but creates turbulence immediately downwind, which reduces output and stresses components. Open fields, hilltops, and coastal areas typically offer the smoothest, strongest winds. If your property sits in a valley or dense tree cover blocks prevailing winds, even a correctly installed turbine will underperform. Prioritize exposure to consistent wind flow over convenience of installation location.
Permits and Utility Notifications
Start with your local building department at least 60 days before installation. Most jurisdictions classify small wind turbines as structures requiring construction permits, similar to sheds or decks. You’ll submit site plans showing property boundaries, turbine location, setback distances from property lines (typically 1.5 times the total height), and nearby structures. Expect to provide manufacturer specifications, foundation engineering calculations, and electrical diagrams.
Setback requirements vary widely, some areas demand 100 feet from neighboring homes, while rural zones may accept shorter distances. Request a variance if your property can’t meet standard setbacks, though this adds weeks to the approval timeline and isn’t guaranteed.
For grid-tied systems, contact your utility company’s interconnection department early in the process. They’ll require an application, often with fees ranging from $100 to $500, and may mandate specific disconnect switches or anti-islanding protection on your inverter. This approval can take 30 to 90 days, so submit paperwork while your building permit processes.
If you live in a community with a homeowners association, review the covenants before purchasing equipment. Some HOAs prohibit wind turbines outright or restrict height and placement. Present a formal request with visual impact studies and noise data to improve approval chances.
Step-by-Step Installation Process
Step 1: Prepare and Pour the Foundation
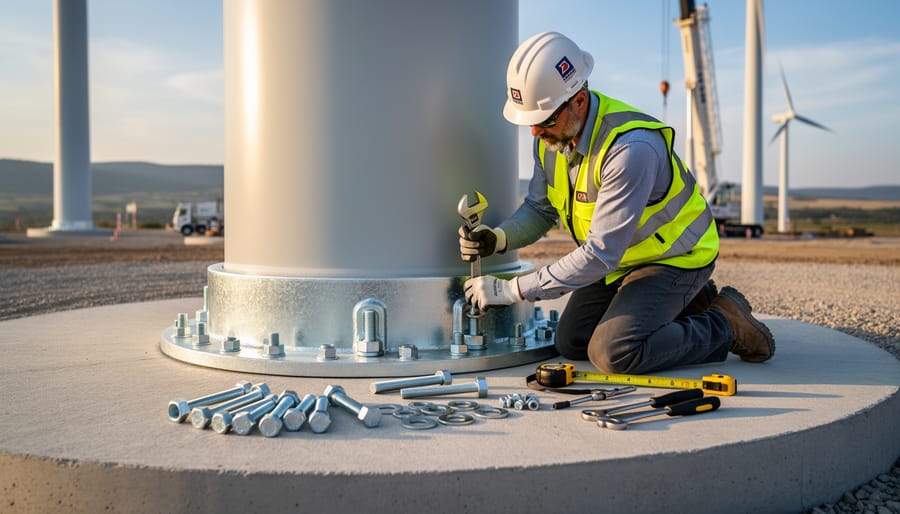
The foundation anchors your turbine against wind loads that can exceed 1,000 pounds of force, so precision here prevents costly problems later. Start by marking a square footprint at least 4 feet across, smaller turbines may need only 3×3 feet, but consult your manufacturer’s specs for exact dimensions.
Dig to the specified depth, typically 3-4 feet below the frost line in your region to prevent heaving. Remove loose soil and create a flat base. Position the anchor bolt template (usually provided with your turbine kit) perfectly level using a spirit level and laser level for accuracy. The bolts must align within 1/8 inch of the tower’s mounting holes, or you’ll face alignment headaches during assembly.
Mix concrete to a 3,000 PSI rating and pour in one session to avoid weak seams. As you fill, vibrate or tap the forms to eliminate air pockets around the anchor bolts. Recheck bolt positions and plumbness before the concrete sets, adjustments are impossible afterward.
Allow a minimum 7-day cure in moderate weather, longer in cold conditions. Resist the urge to rush; premature loading can crack the foundation and compromise structural integrity. Cover the curing concrete with plastic sheeting to retain moisture and prevent surface cracking.
Step 2: Assemble the Tower Sections
Lay all tower sections on flat, level ground, preferably on wood blocks to prevent scratching, and inspect each piece for shipping damage before assembly. Start with the base section and work upward, sliding each subsequent section into place according to the manufacturer’s sequence. Most small wind turbine towers use flanged connections secured by six to twelve bolts; align the bolt holes carefully before inserting hardware.
Check alignment after joining each section. A 4-foot level placed against two sides (90 degrees apart) confirms the assembly stays straight. Even a half-degree misalignment compounds over height, creating vibration and stress once erected.
Torque all bolts to the exact specifications in your manual, typically 30-50 ft-lbs for small turbine towers, but this varies by bolt grade and tower material. Use a torque wrench, not a standard ratchet. Work in a star pattern (opposite bolts alternately) to distribute pressure evenly and prevent warping the flange.
Tower type variations: Monopole towers assemble as one straight column. Guyed towers require pre-installing guy wire attachment points at designated heights during ground assembly. Tilt-up towers need the hinge mechanism installed at the base before raising, with a clear pivot area marked out.
Step 3: Raise and Secure the Tower
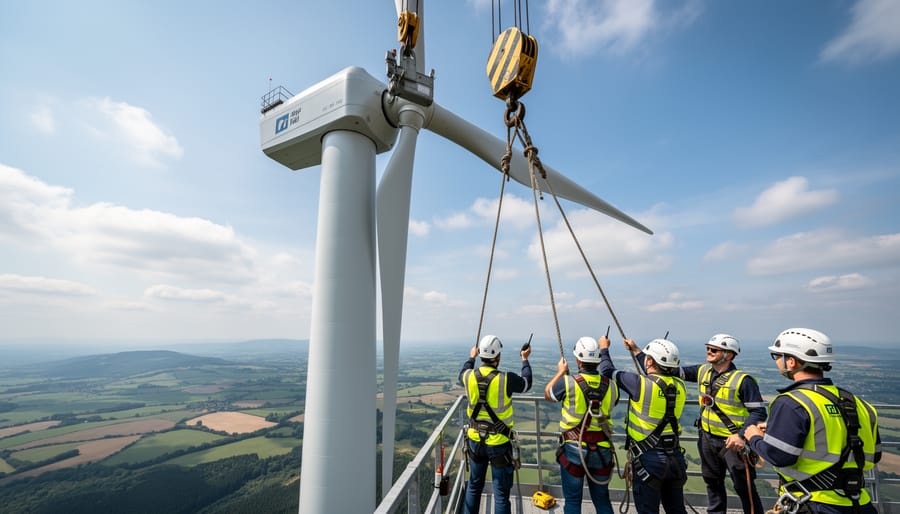
Raising the tower demands meticulous planning and absolute adherence to safety protocols. Never attempt this alone, recruit at least two strong helpers for monopole towers, or three for heavier guyed systems. Brief everyone on their roles before the lift begins, and establish clear hand signals since wind noise can drown out verbal commands.
For tilt-up towers, attach a gin pole (a temporary lifting boom) to the base and use a winch or block-and-tackle to slowly raise the structure. Keep the lifting rope taut and controlled, sudden jerks risk catastrophic collapse. With monopole towers, coordinate a steady vertical lift, walking the tower upright while one person steadies the base. Guide wires help control sway during this critical phase.
Once vertical, immediately secure guy wires if your design includes them. Attach each wire to its ground anchor and tighten to manufacturer-specified tension using a wire tensioning tool, typically around 10% of the wire’s breaking strength. Overtightening stresses the tower; undertightening allows dangerous oscillation in high winds.
Verify vertical alignment using a long level or plumb bob on two perpendicular tower faces. Adjust guy wire tension incrementally until the tower stands perfectly plumb. This alignment directly impacts turbine performance and longevity, so take time to get it precise before moving to turbine mounting.
Step 4: Mount the Wind Turbine
With the tower securely in place, you’re ready to mount the turbine itself, a task that demands careful attention to balance and alignment. Start by hoisting the nacelle (the housing containing the generator and internal components) to the tower top using a rope and pulley system. Never attempt this alone; have at least one helper managing the rope while you guide the unit into position. Once elevated, slide the nacelle onto the mounting bracket and secure it with the manufacturer-supplied bolts, torquing them to exact specifications.
Next comes blade attachment. Most small turbines use a hub that accepts either two or three rotor blades. Before fastening each blade, check that they’re perfectly matched in weight, even a 5-gram difference can cause destructive vibration over time. If your blades didn’t come pre-balanced, weigh them on a kitchen scale and sand the heavier blade tips slightly until they match. Attach blades in the sequence indicated in your manual, tightening each bolt gradually in a star pattern to distribute pressure evenly.
Finally, verify the tail vane or yaw mechanism rotates smoothly through 360 degrees without binding. This component keeps your turbine facing into the wind for maximum energy capture. Apply a small amount of marine-grade grease to pivot points if movement feels stiff. Spin the rotor by hand, it should rotate freely with minimal resistance, signaling you’re ready for the electrical phase.
Step 5: Run Electrical Wiring
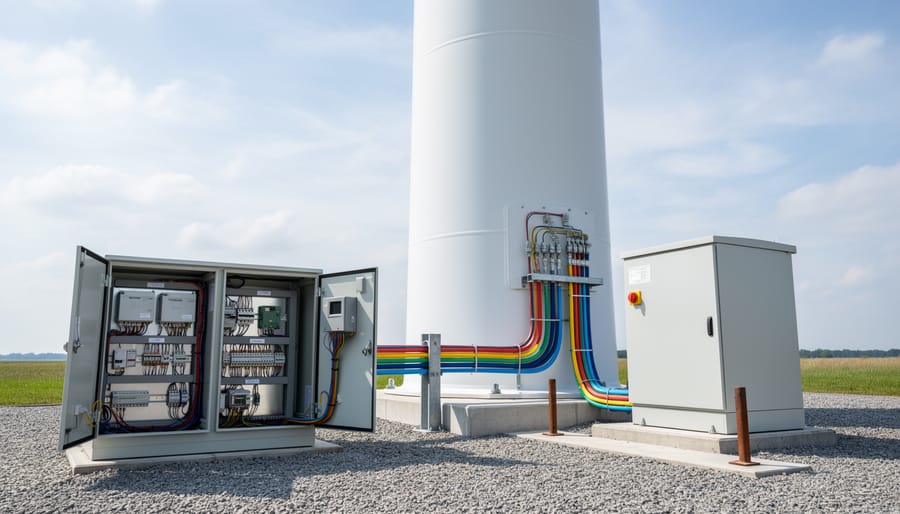
Running electrical wiring from your turbine to the control equipment requires attention to wire sizing, weather protection, and grounding to ensure safe, efficient power transfer. This step connects your wind-generating hardware to the components that regulate and store or distribute that energy.
Start by installing weatherproof electrical conduit from the tower base to your charge controller or inverter location. Use PVC or metal conduit rated for outdoor exposure, securing it every 3-4 feet with mounting brackets. Seal all conduit entry points with waterproof fittings to prevent moisture intrusion that could cause shorts or corrosion.
Wire gauge selection depends on the distance and your turbine’s maximum amperage output. For runs under 50 feet with a 1000W turbine (producing roughly 40-50 amps at 24V), use 6 AWG wire. Longer distances or higher-output turbines require thicker wire, consult voltage-drop calculators to keep losses under 3%. Undersized wire wastes energy as heat and can create fire hazards.
Install a proper grounding system by driving an 8-foot copper ground rod near the tower base and connecting it to the turbine frame with 6 AWG bare copper wire. This protects against lightning strikes and static buildup. Grid-tied systems require a second ground connection at your main electrical panel per National Electrical Code standards.
Step 6: Connect the Charge Controller and Inverter
With the turbine mounted and wiring run, you’re ready to connect the electrical control components that regulate power flow. This step differs significantly depending on whether you’re installing an off-grid battery system or a grid-tied configuration.
For battery-based systems, locate the charge controller near your battery bank in a dry, ventilated space. Connect the turbine’s output wires to the controller’s input terminals, strictly observing polarity, reversing positive and negative can damage electronics instantly. Most small wind charge controllers handle 12V, 24V, or 48V systems; verify your voltage matches the controller’s rating before energizing. Install a fused disconnect switch between the turbine and controller, sized at 125% of the turbine’s maximum amperage output. This switch lets you safely isolate the system for maintenance.
Grid-tied installations require a certified grid-tie inverter that converts the turbine’s variable DC output to synchronized AC power. Mount the inverter according to manufacturer clearance requirements, then wire the turbine output to the inverter’s DC input terminals. Install both a DC disconnect (between turbine and inverter) and an AC disconnect (between inverter and your home’s breaker panel) as required by electrical code. Double-check that your inverter includes anti-islanding protection, a safety feature that shuts down during grid outages to protect utility workers.
Testing, Verification, and System Startup
After completing the physical installation and electrical connections, methodical testing confirms your small wind turbine is ready for safe operation. This verification phase catches potential issues before they escalate into equipment damage or safety hazards.
Begin with a static electrical check before the turbine starts spinning. Using a digital multimeter set to DC voltage, measure the output at the charge controller or inverter input terminals. With the turbine blades manually stopped (rotor brake engaged), you should see zero or near-zero voltage. Any significant reading indicates a wiring fault that requires immediate correction. Next, check all connection points for tightness, loose terminals create resistance that generates heat and reduces efficiency.
Release the brake and allow the turbine to spin in available wind. At modest wind speeds around 10-12 mph, a properly functioning 400W turbine typically produces 12-20 volts, while larger 1kW models generate 24-48 volts depending on design. Your manufacturer’s documentation provides specific voltage curves for different wind speeds. If output reads significantly lower than expected, verify blade pitch angles and check for obstructions affecting rotor rotation. Unusually high voltage at low wind speeds may indicate incorrect controller settings or a wiring polarity error.
Verify all safety systems are working correctly with this checklist:
- Confirm the manual brake engages fully and stops rotor rotation within 5-10 seconds
- Test the automatic overspeed brake activates at the rated maximum RPM (consult your manual)
- Check that guy wire tensions remain equal and tower stays plumb under wind load
- Inspect all mounting bolts for proper torque after the first hour of operation
- Verify the charge controller displays incoming power and battery charging (off-grid systems) or grid synchronization (grid-tied)
Listen carefully during initial operation. A properly balanced turbine runs nearly silently aside from a gentle whoosh. Rattling, grinding, or rhythmic thumping signals imbalance, loose hardware, or bearing issues requiring immediate shutdown and inspection.
Monitor the system closely for 48 hours, checking voltage output and physical condition every few hours. Vibration often appears after several operating cycles as components settle. Retighten tower bolts and blade mounting hardware after this break-in period. Log your power production figures, consistent output matching wind conditions confirms successful installation, while erratic performance indicates adjustments are needed before considering the turbine fully operational.
Ongoing Maintenance and Next Steps
Your turbine is up and running, but installation is just the beginning. Regular maintenance keeps your system generating power efficiently for its 20-year lifespan.
Create a Maintenance Schedule
Mark your calendar for quarterly inspections during the first year. Check all tower bolts and connections for tightness, vibration loosens hardware over time. Inspect guy wire tension if your tower uses them, and look for any signs of corrosion on electrical connections. Annual tasks include testing the brake mechanism, checking blade balance, and examining the tail vane pivot for smooth movement. Most small turbines need minimal maintenance, but these checks prevent small issues from becoming expensive repairs.
Monitor Your Energy Production
Watch your inverter display or monitoring app daily during the first month to understand your turbine’s normal output patterns. Track kilowatt-hours generated weekly and compare against your site’s typical wind conditions. Sudden drops in production signal potential problems, a blade issue, electrical fault, or obstruction blocking wind flow. Many modern charge controllers store historical data, helping you spot trends and verify your system meets expected performance.
Optimize Your Energy Use
Shift high-energy tasks like running dishwashers or charging electric vehicles to windy periods when your turbine generates peak power. For off-grid systems, monitor battery state-of-charge to avoid over-discharge. Grid-tied users can track how much wind energy offsets utility consumption through net metering statements.
Consider pairing your turbine with solar panels for year-round renewable coverage, wind often peaks when solar production drops. Battery storage maximizes self-consumption of generated power rather than sending excess back to the grid at lower rates.
Common Questions About Small Wind Turbine Installation
How much does it cost to install a small home wind turbine?
Total installation costs typically range from $15,000 to $50,000 depending on turbine size, tower height, and site complexity. DIY installation can reduce costs by 30-40% if you handle foundation work and tower assembly yourself, though you’ll still need a licensed electrician for grid connections.
Should I hire a professional or install the turbine myself?
Most homeowners can handle the physical installation with helpers, but professional assistance becomes necessary for electrical work, especially grid-tied systems that require utility coordination and code compliance. Consider DIY for the tower assembly and foundation to save money while hiring an electrician for the final connections.
How long does a typical installation take?
Expect 2-4 days for a complete installation once permits are secured. Foundation curing alone requires 7-10 days before you can proceed with tower erection, so plan the full timeline at 2-3 weeks from breaking ground to generating power.
How much power will my small wind turbine actually generate?
A 1.5kW turbine in a location with 12 mph average wind speeds produces roughly 200-300 kWh monthly, covering 10-20% of a typical home’s electricity use. Larger 5-10kW units can offset 50-80% of consumption in windier locations, though actual output varies significantly with local wind conditions and seasonal patterns.
Will my wind turbine be noisy?
Modern small turbines generate 35-45 decibels at 100 feet, similar to a refrigerator hum, when properly installed and balanced. Vibration noise from loose components or imbalanced blades is the main concern, which proper torque specifications and quarterly maintenance checks prevent.
Many homeowners pair wind turbines with solar panels to create a hybrid renewable system that generates power around the clock. Wind energy often peaks during winter months and nighttime hours when solar production drops, smoothing out the seasonal gaps that represent some of the disadvantages of solar. The combination requires a hybrid charge controller or dual inverter setup, which your electrician can configure during the final connection phase. This approach maximizes your property’s renewable potential since the same roof that hosts solar panels can coexist with a turbine positioned in your yard’s windiest corner, and both systems feed the same battery bank or grid-tie point without interference.
Installing a small home wind turbine puts clean, renewable energy generation directly in your hands. By following these six practical steps, from foundation preparation through final testing, you’re joining the growing movement of homeowners reducing grid dependence and cutting fossil fuel reliance in 2026. The eco-benefits extend beyond your utility bill: every kilowatt-hour your turbine produces displaces carbon-intensive grid electricity, contributing to cleaner air and a more sustainable energy future.
Safety and code compliance aren’t optional. Skipping permits, ignoring electrical standards, or rushing tower assembly can turn a promising renewable energy project into a dangerous liability. Take the time to do it right, or hire a certified installer when the job exceeds your skill level.
Consider how wind complements other renewable technologies. Understanding solar performance factors helps you decide whether to pair with wind power for year-round generation, and reviewing a typical timeline from quote to power can inform your renewable energy planning. Your turbine is a long-term investment in energy independence and environmental responsibility, make it count.